|
1.
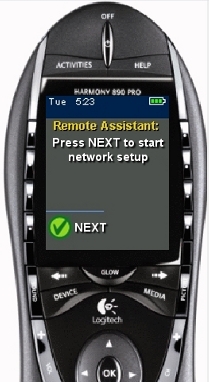
Remote screen will show:
Press NEXT to start network setup
On bottom left LCD screen button, press 'Next'
|
|
|
2.
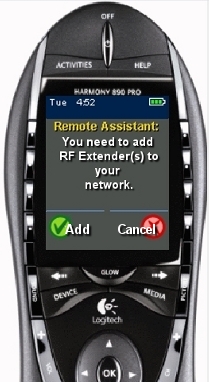
Remote screen will show:
You need to add RF Extender(s) to your network
On bottom left LCD screen button, press 'Yes'
|
|
|
3.
Put One RF Wireless Extender into 'Pairing' mode:
1. On the Wireless Extender you wish to pair, press and hold the 'Connect' button until the 'Status' LED turns on.
2. Let go of 'Connect' button. There should be two buttons lit. The left 'Status' and middle 'Power' LED.
3. If not unplug, reset (using steps above: Reset the RF Wireless Extender) and try again.
|

|
|
4.
Remote screen will show:
Select RF Extender
On either side of extender name, press LCD screen button for the extender that you placed into ‘Pairing’ mode in step 3
|

|
|
5.
Remote screen will show screen (A), or (B)
Even though the remote screen will briefly flash this message, you should not press anything on the RF Extender since we already put it into ‘Pairing’ mode in step 3
If nothing happens and the remote times-out, you will end up on screen (B)>
|

|
|
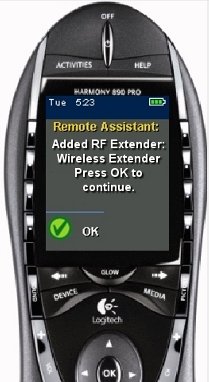
(A)
Added RF Extender: Wireless Extender Press OK to continue
On bottom left LCD screen button, press 'OK'
Repeat steps 3-5 for each RF Wireless Extender.
|
|
|
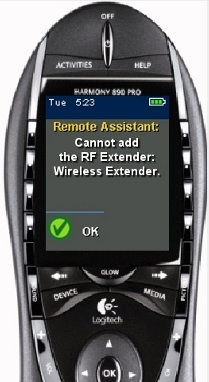
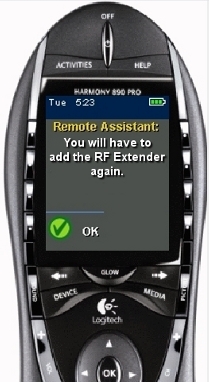
(B)
Cannot add the RF Extender: Wireless Extender
On bottom left LCD screen button, press 'OK'
|
|
|
(B.1)
Remote screen will show:
Ensure your RF Extender is plugged in and powered.
On bottom left LCD screen button, press 'OK'
|

|
|
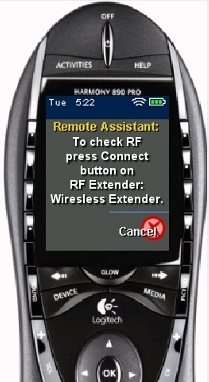
(B.2)
Remote screen will show:
To check RF press Connect button on RF Extender: Wireless Extender
On the Wireless Extender, press and release the 'Connect' button.
|
|
|
(B.3)
Remote screen will show screen (B.4) or (C.1):
If the remote does not detect the extender and times-out you will end up on screen (C.1)
|
|
|
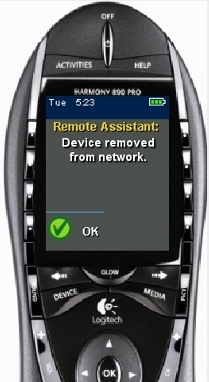
(B.4)
Remote screen will show:
Device removed from network.
On bottom left LCD screen button, press 'OK'
You will return to 'Select RF Extender' screen.
Repeat steps 3-5
|
|
|
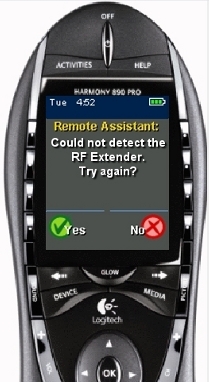
(C.1)
Remote screen will show:
Could not detect the RF Extender. Try again?
On the bottom left LCD screen button, press 'Yes'
|
|
|
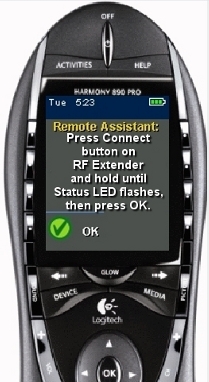
(C.2)
Remote screen will show:
Press Connect button on RF Extender and hold until Status LED flashes, then press OK.
Reset the RF Extender (using steps above: Reset the RF Wireless Extender)
After you’ve reset the problem extender.
On the bottom left LCD screen button, press 'OK'
|
|
|
(C.3)
Put the RF Wireless Extender into 'Pairing' mode:
1. On the Wireless Extender you wish to pair, press and hold the 'Connect' button until the 'Status' LED turns on.
2. Let go of 'Connect' button. There should be two buttons lit. The left 'Status' and middle 'Power' LED.
3. If not unplug, reset (using steps above: Reset the RF Wireless Extender) and try again.
|
|
|
(C.4)
This will bring you back to Step 5 above.
|
|
