How to customize buttons for a Harmony 900 in an ActivityHow to customize buttons for a Harmony 900 in an Activity |
How to customize buttons in an Activity
- Launch the Logitech Harmony Remote software and login to your account
- From the Harmony homepage, click on the
 button for the Activity you wish to customize button for the Activity you wish to customize
- Determine whether you want to customize a Hard or Soft button.
- Mapping a command to a Hard button:
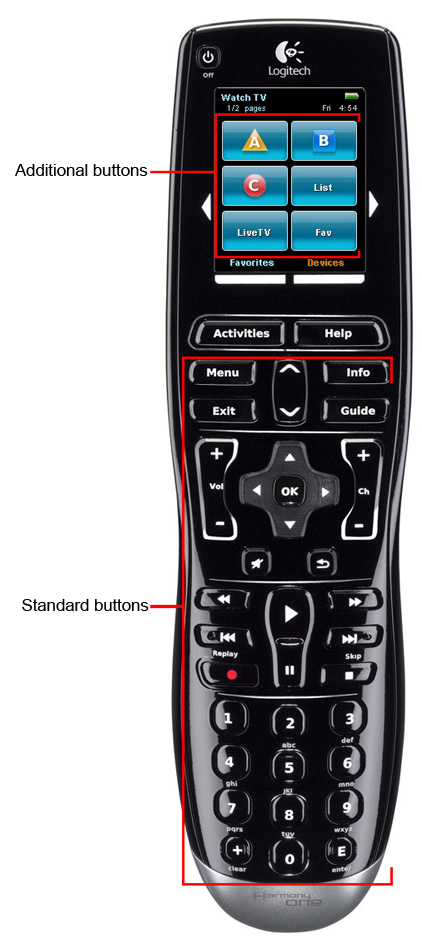
- To map a command to a Hard button, from the Button list select the one you wish to customize. In this example, "mute" is used
- From the Device column, select the device that you want to control with this button
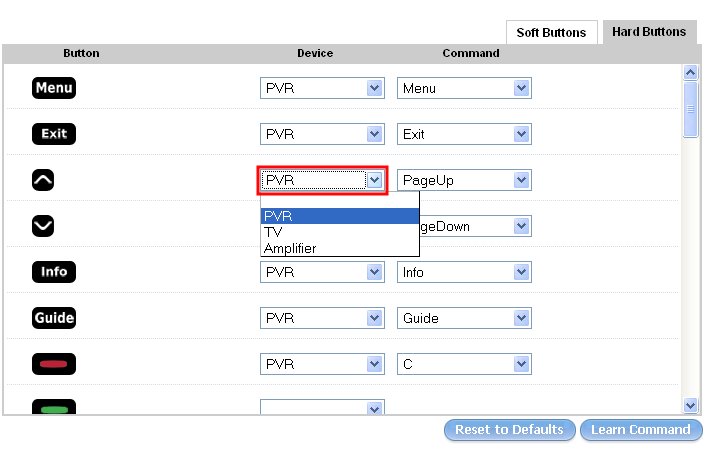
- From the Command column select the command you want the button to send from the dropdown list

- Once finished, click on the
 button at the bottom of the page to save your changes button at the bottom of the page to save your changes
- Update your remote
Mapping a command to an Soft button on the LCD:
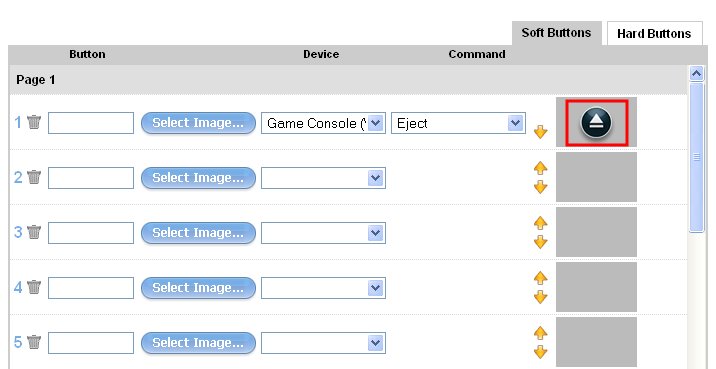
To modify commands on the LCD screen, click on the  Soft Buttons tab at the top of the page. Soft Buttons tab at the top of the page.
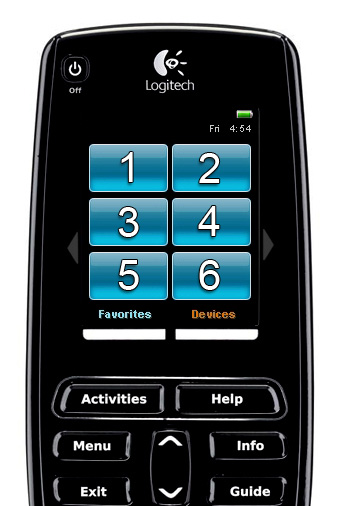
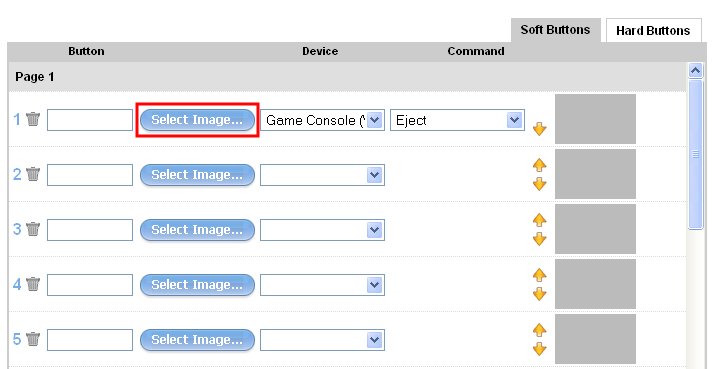
- In the Button column, select the button you wish to customize, from 1 to 6 for each page. The illustration of the remote below shows where each button is placed on the display. In this example, we will assign the Eject command for the Game Console to the first button position

- From the Device column, select the device that you want to control with this button. In this example, we will use the Game Console

- In the Command column, select the command you want from the dropdown list

- You have the choice of either labelling the button or assigning an icon. To label the button, under Button, enter the name you wish to see appear on the LCD screen of the remote. To assign an icon to the button instead, please skip to the next step. If you prefer to simply name the command and not assign an icon please go to

To assign an icon to a button , please follow these steps:
- Click on the
 button button
- Click on the icon you want from the list provided to select it
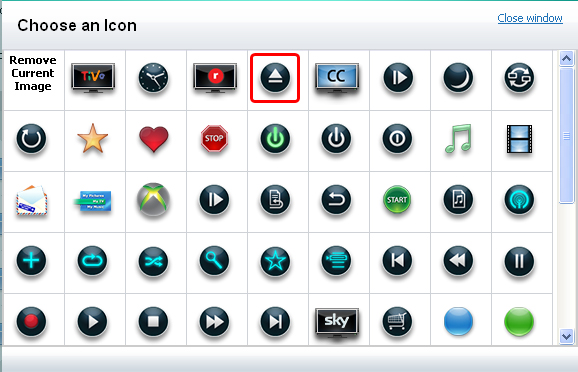
The icon should now be assigned
- After making any changes, ensure that you click on the button to save the button customizations.
- The last step is to update your remote. Connect the Harmony 900 to your computer’s USB cable and click on the
 button on the Harmony homepage button on the Harmony homepage
Navigating the Soft Buttons page

- To delete a button, click on the
 trash can icon beside it trash can icon beside it
- You can move commands to different button positions by using the
 arrows arrows
- Click on the
 button to add another page of buttons on the Custom Control screen button to add another page of buttons on the Custom Control screen
- Click on the
 button if the command you need is not in the drop-down box. You will be able to capture the button from your original remote. For more information, please see article 11729 - Learning a command from your original remote to the Harmony 900 button if the command you need is not in the drop-down box. You will be able to capture the button from your original remote. For more information, please see article 11729 - Learning a command from your original remote to the Harmony 900
If a command isn't mapped correctly for a specific device in Device mode please see article 11724 - How to customize buttons in Device mode for a Harmony 900
|